Homeworlds Chewbacca Spotlight Deck: How to Play the Relentless Rebel
Homeworlds Chewbacca makes an exhausted unit a threat your opponent still has to respect. That is the identity of the Relentless Rebel Spotlight Deck: a board of inexpensive allies, support for their shared traits, and an ability that can turn a unit the opponent thought was finished into another useful attack.
There is a restriction that changes how you should evaluate the whole deck. The attack supplied by this Chewbacca ability cannot target a base. This is a tool for fighting units and arranging the battlefield, not an automatic extra hit to the opponent’s life total.


Jump to a section
- Which Chewbacca and which product?
- Read both sides before planning a turn
- The deck has several jobs, not fifty interchangeable cards
- Key interactions: what each piece actually enables
- An example of sequencing, not a scripted combo
- Opening priorities and likely trouble
- A practical opening-hand and resource plan
- Early, middle, and late game: different jobs
- Three positions worth practicing
- Matchup pressures and the mistakes they expose
- Upgrade after identifying the failure
- Learn the action rhythm before the deck's tricks
- Official fixed main-deck inventory
- Find the deck
Which Chewbacca and which product?
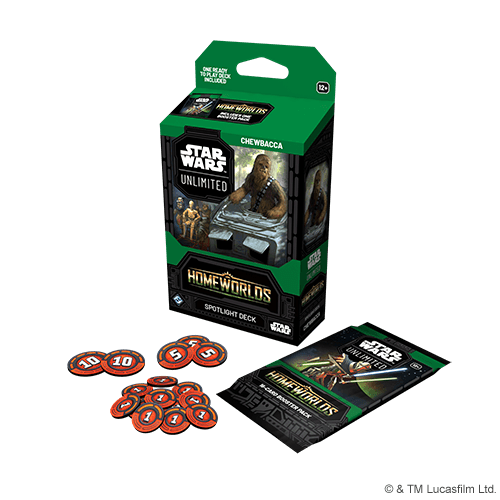
This guide covers Chewbacca — Relentless Rebel, Homeworlds leader 9, not another Chewbacca leader or a fan-built list sharing the character’s name. The preconstructed package contains a fixed 50-card main deck, its leader and base, tokens, counters, and one Homeworlds booster. Its supplied base is Dendroid Wilds, which has the Endor trait.
The guide is based on the published cards and official fixed list, not a claimed B3 tournament run. The first purchase question is whether you enjoy tactical unit combat and sequencing a team of smaller pieces. If your goal is simply to point every action at the enemy base, this leader’s restriction deserves attention.
Read both sides before planning a turn
On the non-unit side, Chewbacca’s action costs two resources and exhausts him. It lets a unit attack even if exhausted, with the base-target restriction already mentioned. Deployment requires controlling at least five resources; that threshold is not a payment of five resources.
His deployed side is a 3-power, 6-HP ground leader unit. Its extra-attack action no longer has the two-resource payment, but is limited to once per round. It still cannot send that attack at a base. Read that once-per-round limit separately from the normal attack Chewbacca can make as a unit.
The practical question is whether the bonus attack earns its place in your sequence. Before deployment, two resources spent using the ability are two resources unavailable for another play. A flashy additional attack is not automatically better than developing another useful unit.

The deck has several jobs, not fifty interchangeable cards
Cheap presence: Ewok Brigade and Champions of Endor help establish a board. More inexpensive units can leave room to pay for the leader ability while continuing to develop. Avoid assuming that playing a low-cost card is always correct; ask what it enables.
Connections between allies: C-3PO links the Rebel and Ewok portions of the deck. Leia Organa and Logray reward particular low-cost-unit interactions. Removing every modest-looking support card to add expensive threats can dismantle the reason the original list works together.
A larger combat tool: Hijacked AT-ST is a particularly useful illustration of Chewbacca’s purpose. Its readiness drawback creates an opening for the leader’s ability to produce an attack before ordinary readying would allow it. The two cards make a plan; evaluate their timing together.
Setup for attacks: Trap Field can help soften a target. That matters when an extra attack would otherwise send a small unit into a fight it cannot finish. Think about the enemy unit you want removed before committing the pieces that make the exchange possible.
Key interactions: what each piece actually enables
Hijacked AT-ST: turn the drawback into a timing opportunity
The Homeworlds Hijacked AT-ST costs five and has 7 power, 7 HP, and Overwhelm. Its entry drawback stops it readying during the next regroup phase. Chewbacca can order an attack while it is exhausted, so that drawback does not make it harmless while you wait.
The important five-resource sequence is play AT-ST, then deploy Chewbacca, then use Chewbacca's unit-side action to attack with the AT-ST. Those are separate actions with opposing actions between them. Paying five for the walker leaves no ready resources, but you still control five; deployment is a threshold rather than another five-resource payment. The deployed action avoids the non-unit leader's two-resource cost.
That line has a real limitation: the opponent can remove or disrupt a piece between your actions. It also requires an enemy unit the AT-ST can legally attack. The ability does not turn the walker into an immediate seven-damage attack aimed directly at the base.
Overwhelm still matters when the base cannot be targeted
Suppose an undamaged 7-power AT-ST attacks an unshielded enemy unit with three remaining HP. With no other effects, three combat damage defeats the defender and four excess damage goes to its base. That is legal because the attack targets the unit; Overwhelm's excess damage is not the same as choosing the base as the attack target. A Shield token or another prevention effect can change the result, so do not promise the overflow before checking the defender.
This is one of the deck's most important distinctions. The leader's restriction stops direct base targeting, but unit combat can still advance your win through Overwhelm and by clearing space for ordinary attacks.
Ewok Archers: meet the condition before committing
The Homeworlds Archers gain Ambush while you control another unit costing three or less. Establish that supporting unit first when possible. A qualifying Ambush attack can happen during the Archers' entry action; after the opponent gets an action, Chewbacca can potentially grant another attack even though the Archers are exhausted.
Both attacks need appropriate targets and surviving attackers. If the Archers die in the first fight, there is no second attack to schedule. If the support condition is not met when relevant, do not assume you received Ambush just because the deck usually contains cheap units.
Trap Field and Adamant Ewoks: change the combat arithmetic
Trap Field can damage an entering enemy before a later attack tries to finish it. Adamant Ewoks supplies entry damage when its Ewok-or-Endor condition is met. The supplied Dendroid Wilds base has Endor, so the base itself supports that condition and Village Troublemaker's relevant Endor check.
Think in breakpoints. A 2-power attacker cannot defeat an undamaged 3-HP enemy through ordinary combat damage, but one prior damage can change that. Check how much damage your actual setup produces, then ask which attacker survives the exchange. The value is not merely dealing a little damage; it is converting an otherwise losing fight into a useful one.
C-3PO, Leia, and the supporting cast
C-3PO strengthens the deck's Rebel and Ewok connections. Leia rewards playing low-cost units with base healing, while Logray punishes damage to qualifying low-cost allies. These pieces give different reasons to preserve a cheap unit beyond its printed power. Chief Chirpa grows with your other Ewoks, and Teebo's Hidden support can help eligible Ewoks remain available long enough to act.
Do not confuse Hidden with complete immunity. Read the keyword's duration and exceptions; effects that do not attack can still matter. Likewise, a unit being valuable as support does not mean it should never attack. Decide whether its ongoing contribution or its immediate combat contribution is worth more in this position.
Bowcaster and Han: useful tools with timing costs
Chewbacca's Bowcaster rewards being attached to Chewie himself with resource acceleration. That can support later paid leader actions if Chewie is defeated. But an upgrade and the unit carrying it are exposed together: spending resources on the weapon before an opponent removes the host can be a costly exchange.
The Han Solo printing in the official deck can ready the AT-ST, creating another attack opportunity. Ordinary attacks, readying effects, and the leader's once-per-round granted attack are distinct tools. Count the actions and enemy responses between them; “potentially three attacks” is a possible sequence, not a guarantee that playing Han immediately deals three attacks' worth of damage.
An example of sequencing, not a scripted combo
Imagine you already have a useful unit exhausted and the opponent has a threatening unit in the same arena. You could pay for Chewbacca’s action immediately. First ask whether another available action improves the trade, and whether waiting gives the opponent a chance to remove your attacker.
There is no universal answer. Acting now can protect an opportunity; acting later can improve the result. The opponent gets actions between your separate plays. A plan that requires three uninterrupted actions should be tested against what they can actually do after the first one.
When the extra attack clears a defender, your remaining normal attacks may have better targets. That is how unit-focused pressure can help a base-damage plan without pretending the bonus attack itself ignores its restriction.
Opening priorities and likely trouble
Look for an affordable opening and a sensible way to continue developing. An expensive payoff without early plays is a different hand from a curve that reaches it with a functioning board. Keep track of which cards you repeatedly resource because they are stranded; that is useful evidence for an eventual upgrade.
Your extra attacks still need suitable attackers and legal targets. Losing the board can make the leader ability less useful, while ignoring the space arena can leave an entirely different problem unsolved. Before spending two resources on another ground fight, check what can still damage your base from space.
Claiming initiative also ends your actions for the phase. Do not claim it with a valuable Chewbacca action unused unless going first next round is worth giving that opportunity up.
A practical opening-hand and resource plan
I would first look for a playable early unit and a follow-up that shares the deck's low-cost plan. Then identify two opening resources. A hand of impressive support pieces without an affordable body can leave the leader's ability doing nothing useful.
A hand containing an early body, a useful follow-up, and Hijacked AT-ST offers a plausible route toward five resources. Keeping the walker still has a price: you must find two other cards to resource now and enough later cards to continue growing. If preserving every attractive payoff ruins the opening, keep the functioning curve instead.
Do not routinely resource every space unit just because the ground synergies are easier to see. Phoenix Squadron A-Wing and the deck's other ships are part of the inventory for a reason: ignoring space can concede repeated base damage your ground combat cannot remove. Evaluate a space card against the opponent's visible plan before deciding it is expendable.
Early, middle, and late game: different jobs
Before deployment: establish something worth reusing
Develop affordable bodies and preserve enough useful cards to continue resourcing. Use the paid leader action when the extra attack changes a meaningful exchange: removing a dangerous unit, exploiting an On Attack effect, or enabling an important Overwhelm fight. Spending two simply because the ability is available can delay the board you need to make it good.
At five resources: choose your action order
Check whether you should attack with an existing unit before exposing a deployment sequence. If the opponent can remove an exhausted attacker, using the leader action immediately may bank value. If the best line needs a fresh AT-ST, spending your five resources and deploying later can be correct, but gives the opponent separate windows to interfere.
Chewbacca's unit-side action does not list an exhaust cost, so using his normal attack does not itself shut off that once-per-round ability. He must still be in play and the chosen attack must be legal. Sometimes the lower-risk order is to use the valuable granted attack before risking Chewie in combat.
After deployment: turn board control into a finish
Do not spend the entire game proving you can win unit trades. Once you have removed the threats that matter, use normal attacks to pressure the base. Count the opposing leader's deployment, potential counterattacks, and the damage available in space before committing to a race.
If Chewie is defeated, return to evaluating the paid non-unit action with your remaining resources. You cannot deploy him again just because you have reached the threshold a second time. Losing him also changes your future resource budget, so avoid planning the next phase around a free activation that no longer exists.
Three positions worth practicing
- You have four resources and a two-cost unit in hand. Playing it and paying two for Chewie can use the whole budget, if the resulting attack is worthwhile. A four-cost play may instead develop a stronger future board. Compare the actual trade rather than treating an activation as mandatory.
- Your AT-ST has seven power and the opponent presents a small ground defender. Check remaining HP, Shields, and legal attack restrictions. This may be an efficient Overwhelm route; it may also be bait if the attack leaves your base defenseless.
- Your ground is winning but an enemy ship keeps hitting the base. Decide whether to develop a ship, use a suitable answer, or race. More favorable ground trades do not automatically solve the damage clock in the other arena.
Matchup pressures and the mistakes they expose
Against fast pressure, a paid bonus attack must earn back enough damage or board presence to justify slowing development. Watch both arenas. Leia's healing can matter, but it does not excuse ignoring a repeated attacker.
Against control, spreading value across several useful units can be preferable to loading all resources onto one upgraded target. Holding a follow-up can help after removal, although playing too cautiously may give a slower opponent time to establish their own finish. These are matchup principles, not a claim that this fixed deck has a measured favorable win rate.
Against a defensive Tarkin plan, distinguish the enemy base's Fortify upgrades from the units guarding it. Chewie's granted attack does not directly remove a base upgrade. Maintain a path to base damage and pay attention to the resource count approaching Tarkin's deployment; endlessly cleaning up small units can serve the defender's timetable.
Upgrade after identifying the failure
Play the fixed deck before replacing cards. Record whether losses came from failing to develop, losing a key attacker before using it, spending too much on the ability, or leaving an arena exposed. Then change a small number of cards addressing that particular problem.
Check the exact leader version, full card identity, aspect costs, and format legality before copying a list. This product includes cards from previous releases; release date alone is not a substitute for checking eligibility. Buy required singles once you have a specific change in mind instead of opening packs hoping to discover it.
Concrete upgrade experiments, without a shopping spree
The fixed list already includes three copies each of C-3PO, Trap Field, Ewok Archers, Bowcaster, and Hijacked AT-ST. Do not recommend a fourth copy of one as an ordinary constructed upgrade. Instead, examine why you missed the effect you wanted: you may need better sequencing or additional cards performing a similar job.
Consistency test: if Champions of Endor is repeatedly the useful early body you want, test moving its supplied two copies to three by replacing one high-cost or situational card that has actually underperformed. Record which card you removed and whether the change improves early hands across several games.
Space test: if you repeatedly lose to unanswered ships, test another copy of a useful supplied space unit, such as Phoenix Squadron A-Wing, before buying an entirely different engine. Verify the exact printing and aspects. A third copy is an experiment, not a universal prescription.
Support test: if a particular singleton such as Teebo consistently enables your plan, test an additional copy after checking cost and availability. If you keep resourcing that card or cannot meet its setup needs, adding more may worsen the hand rather than improve consistency.
Make one small change at a time and keep the main deck at the intended size. Check the current format's legality and copy limits. I would not attach a tournament-ready label or an expensive shopping list to these untested changes.
Learn the action rhythm before the deck's tricks
For a quick visual introduction, B3’s How to Play guide includes an 8:45 beginner tutorial. It explains the core action rhythm; use the worked examples here for this exact leader and fixed deck.
Official fixed main-deck inventory
The published list contains the following 50 main-deck cards, plus Chewbacca and Dendroid Wilds. Names below identify the printed product inventory; consult the linked official list for set markers and the individual card versions.
- 1 each: Wicket; Chief Chirpa; Cassian Andor; Ezra Bridger; Mon Mothma; Teebo; Logray; Crix Madine; Cham Syndulla.
- 2 each: Leia Organa; Village Troublemaker; Adamant Ewoks; Champions of Endor; Ewok Brigade; Ewok Warrior; Phoenix Squadron A-Wing; Blue Leader; Massassi Group Marines; Red Five; Han Solo; Defiant Hammerhead; Insurgent Saboteurs.
- 3 each: C-3PO; Trap Field; Ewok Archers; Chewbacca’s Bowcaster; Hijacked AT-ST.
Find the deck
As an Amazon Associate, B3 earns from qualifying purchases.
Search Amazon for the Homeworlds Chewbacca Spotlight Deck. This is a search link: check that the result is the fixed deck, in the language you want, rather than a single leader card or a booster.
Sources: official package contents, official deck explanation and fixed lists, leader images and Homeworlds introduction, and current rules and errata. Checked October 19, 2026.
Keep exploring: B3’s Star Wars: Unlimited hub · First-game walkthrough · Buying guide.
Compare the paired deck: Homeworlds Grand Moff Tarkin Spotlight Deck Guide: Fortify and Deploy the Death Star. Browse all twelve Spotlight Deck guides and the SWU learning guides.
Considering packs for upgrades? Read the Homeworlds booster buying guide before choosing a sealed product. For premium treatments, see Carbonite packs explained.