Ashes of the Empire Emperor Palpatine Spotlight Deck Guide: Advantage and Support
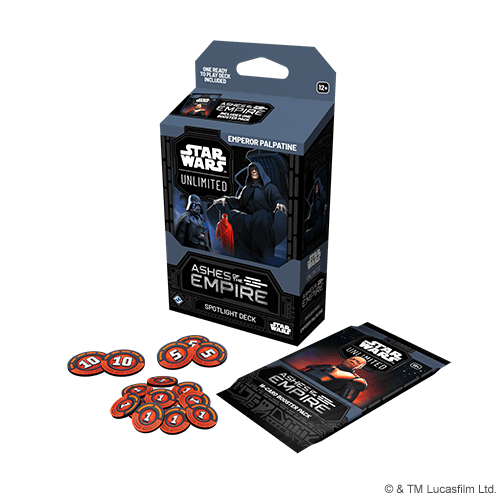
Emperor Palpatine's Ashes of the Empire deck turns a wide board into a temporary concentration of power. A collection of modest units becomes the fuel for one much more threatening attack. The danger is that Advantage can disappear in a defensive fight before you get the attack you were imagining.
This is not the Secrets of Power Chancellor Palpatine Plot deck or the original resource-sacrifice Emperor. This version asks you to manage exhausted units, protect future attackers, and use Support to turn a growing board into immediate pressure. I would choose it for someone who enjoys sequencing several pieces rather than relying on one enormous card.


Jump to a section
- Awaiting His Arrival: the exact leader
- Advantage is power held under a condition
- Build a board before trying to multiply it
- How Support connects development to attacks
- A four-unit token calculation
- Moff Jerjerrod and the cost of waiting for the perfect setup
- Defensive pieces are there to preserve a future attack
- The seven-resource leader turn
- What beats the plan
- Small upgrades that test an actual problem
- B3's verdict
- Official fixed 50-card main deck
- Buying the deck and choosing upgrades
- Learn the rules, then test the fixed deck
Awaiting His Arrival: the exact leader
Emperor Palpatine — Awaiting His Arrival is Ashes of the Empire #015, Cunning/Villainy. His non-unit action exhausts him to choose an exhausted friendly unit and give it an Advantage token for each other friendly unit. The chosen unit is excluded from that count. If you have four units total, the chosen one normally receives three tokens, not four.
He deploys at seven resources into a 4-power, 8-HP ground leader unit. His On Attack ability offers the same distribution to another exhausted friendly unit. That means the deployed leader's attack is part of setting up someone else's power, rather than a promise that Palpatine boosts himself before every combat.
The supplied base is Emperor's Throne Room. Read the base and leader separately when counting your normal aspects. Units showing extra aspect icons do not ordinarily expand the icons that pay your aspect penalties, even though their presence may matter to other abilities.
Advantage is power held under a condition
Each Advantage token gives +1 power and +0 HP. When the unit's attack or defense ends, the token is defeated. It can survive regroup if the unit has not fought, but it is not permanent growth that you keep after the first combat.
Imagine a 2-power unit with three Advantage tokens. It now hits for five, but its HP is unchanged. If the opponent sends a cheap unit into it, the boosted defender can hit back and then lose the tokens after that defense. You may get a favorable trade, but you no longer have the five-power base attack you were saving.
This is why placing tokens on an exhausted unit is a tactical promise your opponent can interact with. Your job is to make disrupting that promise costly, or arrange a legal attack before they get a clean opportunity. Sentinel protection, target selection, and Support all matter to that task.
Build a board before trying to multiply it
Ant Droid, Emperor's Messenger, and the deck's inexpensive ships help establish enough pieces for the leader's counting effect to matter. A turn spent putting another useful body into play can increase both the board and the next token distribution. A hand with only expensive payoffs can do neither.
For an opening keep, identify two resources and a first play you can afford. Then ask which card follows it without leaving an empty turn. I would prefer a realistic early curve over a beautiful collection of Executor, Vader, and expensive support that will sit in hand while an opponent races.
Do not make “wide board” mean “play every card immediately.” Against sweepers or efficient removal, preserve a follow-up if committing another unit does not improve the current damage clock enough. The leader rewards quantity, but the game still rewards useful quantity.
How Support connects development to attacks
Support lets an entering unit enable an attack with another unit, granting that unit the supporter's other abilities for that attack. The selected attacker still needs to be eligible; Support does not by itself state that exhausted units may attack. Plan around a ready attacker instead of assuming the keyword automatically spends every saved Advantage pile.
The useful sequencing question is often whether to attack before developing or develop through a Support unit first. If your existing ready unit can use a borrowed ability, the latter can gain value without offering an unrelated opponent action between the entry trigger and the nested attack. That is different from playing a normal unit and waiting until your next action to attack.
Rukh and Emperor's Champion illustrate why the borrowed text matters. An eligible attack can combine a protected combat exchange with the relevant reward for defeating an enemy. Before announcing it, check the defender's remaining HP, your attacker's survival, and which abilities operate during that specific attack.
A four-unit token calculation
Suppose you have four friendly units, including an exhausted Forest Patroller, and Palpatine is still on his non-unit side. His action can give the Patroller three Advantage tokens. If your opponent removes one of the other units before you use the action, the same target receives two instead. Counts are based on the actual state when the effect resolves, not the board you had before the opponent's last play.
Now suppose the Patroller has Overwhelm and eventually attacks a defender with three remaining HP while showing six power. Ignoring prevention and other effects, three damage defeats the unit and three excess reaches the base. The extra power changes both the trade and the damage race. If the target has a Shield, recalculate; do not assume the same overflow.
The trap is using the leader action simply because it produces a large number. Ask whether that specific unit can convert the number into useful combat before the enemy consumes it defensively or removes the unit. Sometimes spreading development or protecting a smaller attacker is the better investment.
Moff Jerjerrod and the cost of waiting for the perfect setup
Jerjerrod can amplify your token plan, making him an attractive card to preserve. That does not mean you should refuse every useful Advantage opportunity until he appears. The opponent's base damage and your resource curve still move while you wait.
I would judge a token multiplier by the attacks it changes, not the size of the pile it photographs well beside. If an ordinary distribution already produces a winning trade, postponing it may give the opponent a chance to remove the attacker. If the extra tokens cross a vital breakpoint, the setup can be worth protecting.
Executor is the later, wider version of this question. A large fleet payoff has more value when you have bodies to benefit, but less if the resources required to reach it mean surrendering the game first. Be willing to resource an impressive late card when keeping it would leave the early hand unusable.
Defensive pieces are there to preserve a future attack
Moff Gideon supplies a Sentinel role and a recovery angle for eligible Imperial units. A protector may allow a different exhausted unit to keep its Advantage through the phase. Remember the arena restriction: a ground Sentinel does not ordinarily stop a space attacker hitting your base or a space unit.
Darth Vader's Sentinel condition depends on being ready. If you use him to attack, reevaluate the defensive coverage you just surrendered. If you keep him ready solely to protect an Advantage investment, compare that protection with the attack you chose not to take.
Bothan-5, 8D8, and Shin Hati's Fiend Fighter offer ways to turn unit losses or departures into further value. Read those exact conditions instead of treating any defeat as interchangeable with any other. A deliberate sacrifice can be profitable, but it still costs a body that may have mattered to your leader's next count.
The seven-resource leader turn
Deployment gives you a new ready ground unit, but its normal attack remains another action. Before spending the phase's resources, decide which ally should be exhausted when Palpatine attacks and what that ally is supposed to do afterward. A plan that boosts an ally already unable to contribute may simply store value for the opponent to disrupt.
You can also use a leader attack to set up the next round, keeping Advantage on a unit that will ready in regroup. That creates a reason to care about initiative: acting first might bank the boosted attack before removal. But claiming initiative also gives up all your remaining actions this phase, so do not discard a useful attack merely to preserve a theoretical next one.
Once a unit has fought, remove the tokens at the correct time. Leaving them on the table creates false power for subsequent effects and makes it harder to learn which parts of the deck actually generated value.
What beats the plan
Efficient removal can turn several setup actions into nothing. Forced defensive combats can consume Advantage prematurely. A weak early curve can leave too few bodies for the leader to multiply. Those are different losses and need different fixes.
Against a deck like Ashes Luke, expect healing to improve repeated trades if you fail to finish units. Against fast pressure, do not assume your bigger future attack will matter more than the next enemy hit. Against a defensive base strategy, identify how your normal attacks and Overwhelm can produce enough base damage before the opponent's payoff.
Avoid stacking everything on the same attractive unit every round by habit. Ask which removal the opponent can afford and whether another target creates a more awkward choice. Your deck's strength is the ability to make several bodies relevant; use that flexibility.
Small upgrades that test an actual problem
Many central cards already arrive as three copies: Ant Droid, Emperor's Messenger, Flanking TIE Interceptor, Jerjerrod, Forest Patroller, Emperor's Champion, Vader, Executor, and There Is No Conflict. A recommendation to add a fourth would ignore ordinary constructed limits.
If the early space lane is the recurring weakness, test a third Helix Starfighter or another suitable supplied ship while removing a consistently stranded card. If your boosted allies keep losing their value to incoming attacks, test whether a third Moff Gideon or a different defensive balance helps. Keep the exact aspect costs and arena coverage visible.
Do not buy every singleton because it has a dramatic ability. Rukh may support a direction you enjoy, but adding copies changes the curve and the kinds of draws you receive. Test the interaction with the stock list first, then make one deliberate change and record whether the expected improvement happened.
B3's verdict
This is a sequencing deck wearing an aggression costume. The large power numbers are the reward for arranging units, exhaustion, protection, and attack timing correctly. I would recommend it to a player who enjoys planning two or three linked actions while adapting to interruptions. If you want straightforward permanent stat growth, Advantage will make you work harder than its name suggests.
Official fixed 50-card main deck
The leader and Emperor’s Throne Room base sit outside these 50 main-deck cards. Counts below follow the official product list; earlier printings and same-name cards can have different abilities. Use the linked original for printed card numbers and previous-set markers.
- 1 each: 8D8; Rukh; Bothan-5; The Great Mothers; Craving Power.
- 2 each: Screeching TIE Fighter; Shin Hati’s Fiend Fighter; Ferry Droid; Moff Gideon; Helix Starfighter; Gozanti Assault Carrier; Nowhere to Hide; Long Live the Empire; Hold Them Off.
- 3 each: Ant Droid; Emperor’s Messenger; Flanking TIE Interceptor; Moff Jerjerrod; Forest Patroller; Emperor’s Champion; Darth Vader; Executor; There Is No Conflict.
Inspect the official complete decklist image. The list includes both paired products; use the section headed Emperor Palpatine.

Buying the deck and choosing upgrades
This is one player’s preconstructed deck, not a two-deck starter. An opponent needs their own playable deck. Check language, sealed condition, included accessories, and whether the listing is a single deck rather than a display or an individual leader card. Compare delivered prices; no live price or stock promise is made here.
As an Amazon Associate, B3 earns from qualifying purchases.
View the Ashes of the Empire Emperor Palpatine Spotlight Deck on Amazon.
Learn the rules, then test the fixed deck
For a quick visual introduction, B3’s How to Play guide includes an 8:45 beginner tutorial. It explains the core action rhythm; use the worked examples here for this exact leader and fixed deck.
Keep the stock deck together for the first games. Record one resource choice, one action-order decision, and one card that felt stranded. Change a few slots only after identifying a repeated problem. For the next purchase, compare complete decks, singles, and boosters in the buying guide.
Event play: check the current format, reprint eligibility, errata, and suspended list before bringing the stock deck to an event. These products mix printings from different sets; an old printing may remain legal through an eligible reprint, but a recent package is not itself a legality certificate. Proposed upgrades here are small experiments, not a verified competitive list.
Card and inventory checks: October 20, 2026. Sources: official Spotlight Deck overview, official first look and leader images, current rules, errata, and suspended cards, and the original decklist linked above. Future rule or format changes take precedence.
Return to B3’s Star Wars: Unlimited hub.
Scope: the official Ashes of the Empire fixed Spotlight Deck, led by Emperor Palpatine — Awaiting His Arrival. This is rules-based analysis of the printed deck, with proposed practice and upgrade ideas; it does not claim B3 tournament results or hands-on testing.
Compare the paired deck: Ashes of the Empire Luke Skywalker Spotlight Deck Guide: Heal, Survive, Attack Again. Browse all twelve Spotlight Deck guides and the SWU learning guides.
Considering packs for upgrades? Read the Ashes of the Empire booster buying guide before choosing a sealed product. For premium treatments, see Carbonite packs explained.